基于XML管理bean
搭建基本环境
在这之前,建议在父工程中的pom文件里导入我们需要的依赖,这样其里面的子工程会自动添加,会方便许多
父工程(Spring6)的pom.xml文件,导入相关依赖
1 2 3 4 5 6 7 8 9 10 11 12 13 14 15 16 17 18 19 20 21 22 23 24 25 26 27 28 29 <dependencies > <dependency > <groupId > org.apache.logging.log4j</groupId > <artifactId > log4j-core</artifactId > <version > 2.19.0</version > </dependency > <dependency > <groupId > org.apache.logging.log4j</groupId > <artifactId > log4j-slf4j2-impl</artifactId > <version > 2.19.0</version > </dependency > <dependency > <groupId > org.springframework</groupId > <artifactId > spring-context</artifactId > <version > 6.0.2</version > </dependency > <dependency > <groupId > org.junit.jupiter</groupId > <artifactId > junit-jupiter-api</artifactId > <version > 5.3.1</version > </dependency > </dependencies >
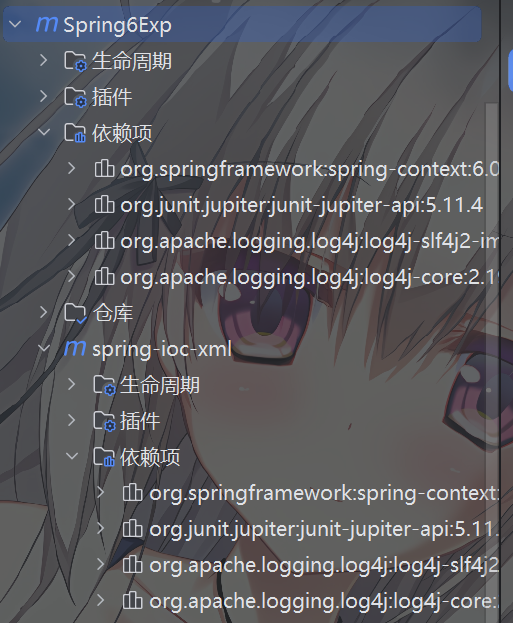
设置成功刷新后,Maven里应该是这样子的
image-20250419201336427
搭建子模块spring6-ioc-xml
在Spring6父工程中创建子模块,在子模块中的resources文件夹下创建配置文件–bean.xml
创建相关的User类,以便后续测试使用,注意有分包的好习惯
1
2
3
4
5
6
7
8
9
10
package com.sakurapaid.spring.iocxml; public class User { private String name; private int age; public void test () { System.out.println("这是一个test测试输出~( ̄▽ ̄)/" ); } }
获取bean实例
首先在bean.xml配置文件中进行配置
1
2
3
4
5
6
7
8
9
<?xml version="1.0" encoding="UTF-8" ?> <beans xmlns ="http://www.springframework.org/schema/beans" xmlns:xsi ="http://www.w3.org/2001/XMLSchema-instance" xsi:schemaLocation ="http://www.springframework.org/schema/beans http://www.springframework.org/schema/beans/spring-beans.xsd" > <bean id ="user" class ="com.sakurapaid.spring.iocxml.User" > </bean > </beans >
在Spring的XML配置文件中,<bean>元素用于定义一个Bean实例。id
属性为 Bean 定义一个唯一标识符,可以通过这个标识符在其他地方引用这个
Bean 。class 属性指定了创建 Bean 实例时使用的类,它告诉 Spring
容器要实例化哪个类。
例如,在示例中,<bean id="user" class="com.sakurapaid.spring.iocxml.User">表示Spring将实例化一个com.sakurapaid.spring.iocxml.User类的
Bean,并将其标识符设置为”user”。(这样就省去了自己手动创建实例化对象相关的操作)
其中与XML
Schema相关的部分格式是固定的,我们只关注<bean>的配置
每个`都有一个id`标识,相当于Bean的唯一ID;
在userServiceBean中,通过``注入了另一个Bean;
Bean的顺序不重要,Spring根据依赖关系会自动正确初始化。
只不过Spring容器是通过读取XML文件后使用反射完成的。
如果注入的不是Bean,而是boolean、int、String这样的数据类型,则通过value注入,例如,创建一个HikariDataSource:
1 2 3 4 5 6 7 8 <bean id ="dataSource" class ="com.zaxxer.hikari.HikariDataSource" > <property name ="jdbcUrl" value ="jdbc:mysql://localhost:3306/test" /> <property name ="username" value ="root" /> <property name ="password" value ="password" /> <property name ="maximumPoolSize" value ="10" /> <property name ="autoCommit" value ="true" /> </bean >
再创建一个相关的测试类UserTest.Java
1
2
3
4
5
6
7
package com.sakurapaid.spring.iocxml; public class UserTest { public static void main (String[] args) { } }
根据id获取
1 2 3 User user1 = (User) context.getBean("user" );System.out.println(user1);
根据Bean的类型获取实例
1 2 3 User user2 = (User) context.getBean(User.class);System.out.println(user2);
根据Bean的id和类型获取实例
1 2 3 User user3 = context.getBean("user" , User.class);System.out.println(user3);
输出都是一样的
1 2 3 4 5 6 7 8 9 10 11 12 13 14 15 16 17 18 19 20 21 22 23 24 25 26 27 28 29 30 31 32 33 34 35 package com.sakurapaid.spring.iocxml; import org.springframework.context.ApplicationContext;import org.springframework.context.support.ClassPathXmlApplicationContext; public class UserTest { public static void main (String[] args) { ApplicationContext context = new ClassPathXmlApplicationContext ("bean.xml" ); User user1 = (User) context.getBean("user" ); System.out.println(user1); User user2 = (User) context.getBean(User.class); System.out.println(user2); User user3 = context.getBean("user" , User.class); System.out.println(user3); } }
在传统的编程方式中,我们通常需要在代码中通过 new
关键字创建对象实例,同时还需要手动管理对象之间的依赖关系。然而,在这段Spring的IoC示例中:
我们需要创建一个Spring的IoC容器实例,然后加载配置文件,让Spring容器为我们创建并装配好配置文件中指定的所有Bean,这只需要一行代码:
通过 ClassPathXmlApplicationContext 加载了名为 “bean.xml”
的Spring配置文件,这个配置文件中定义了Bean(这里是 User
类的实例)的创建方式和依赖关系。
1 ApplicationContext context = new ClassPathXmlApplicationContext ("application.xml" );
然后,我们通过三种不同的方式从Spring容器中获取 User 类的实例:
直接通过Bean的id(“user”)获取。
根据Bean的类型(User.class)获取唯一匹配的Bean。
同时指定Bean的id和类型获取实例。
从Spring容器中“取出”装配好的Bean然后使用它
1 2 3 4 UserService userService = context.getBean(UserService.class);User user = userService.login("bob@example.com" , "password" );
在以上每步中,都没有直接执行 new User() 来创建对象,而是由Spring
IoC容器负责创建并管理这些对象。这就是所谓的“控制反转”:对象的创建控制权从应用代码转移到了Spring容器,从而实现了对象的生命周期管理、依赖关系注入等高级功能,减少了代码之间的耦合度,增强了系统的可维护性和可扩展性。
注意点
当在Spring的IoC容器中配置了两个相同类型的Bean,会怎么样?
当在Spring的IoC容器中配置了两个相同类型的Bean时,例如:
1
2
<bean id="user1" class="com.ergoutree.spring.iocxml.User" ></bean> <bean id="user2" class="com.ergoutree.spring.iocxml.User" ></bean>
这时,如果你试图仅根据类型(User.class)来获取Bean,Spring容器会因为无法确定具体应该返回哪个Bean实例而抛出异常。当Spring容器中存在多个同类型Bean定义时,若仅根据类型来查找,容器无法唯一确定应该返回哪一个Bean实例,因为按照类型查找期望得到的是唯一的匹配Bean。
如果需要根据类型获取Bean,需要确保容器中对应类型的Bean只有一个,或者通过Bean的id来明确指定要获取的Bean。
如果一个实现类实现了接口,根据接口类型可以获取 bean
吗?
UserDao 接口
1
2
3
public interface UserDao { public void test () ; }
UserDaoImpl 实现类
1
2
3
4
5
6
public class UserDaoImpl implements UserDao { @Override public void test () { System.out.println("UserDao01 test" ); } }
UserTest 添加
1
2
3
UserDao bean = context.getBean(UserDao.class); System.out.println(bean); bean.test();
最后运行抛出异常 因为 bean.xml 中没有进行配置
1 Exception in thread "main" org.springframework.beans.factory.NoSuchBeanDefinitionException: No qualifying bean of type 'com.ergoutree.interf.UserDao' available
因为UserDao是一个接口,接口是不能有自己的对象,只能由实现它的类userDaoImp01来创建对象,所以下面
1 2 3 <bean id ="userDaoImp01" class ="com.sakurapaid.spring.iocxml.interf.UserDaoImp01" > </bean >
<bean> 元素是用来声明和定义Spring
IoC容器中托管的一个Bean实例。
id=“userDaoImp01”:这部分指定了在Spring容器中的Bean的唯一标识符,通过这个ID,你可以从容器中获取或引用这个Bean实例。
class="com.sakurapaid.spring.iocxml.interf.UserDaoImp01":这部分定义了Bean的实现类,即当
Spring 容器创建这个Bean 时,会使用这个类的信息来生成 Bean
的实例。尽管UserDao是个接口,但在实际应用中,我们需要通过其实现类UserDaoImp01
来创建对象,因为接口不能实例化,只有具体的实现类才能生成对象实例。
此配置意味着Spring IoC容器将在启动时根据 UserDaoImp01
类的无参构造函数来创建一个Bean实例,并将其注册到容器中,之后在任何需要
UserDao 接口的地方,都可以通过 Spring 容器自动注入或通过 getBean
方法根据 Bean 的 ID(这里是”userDaoImp01”)来获取到这个实现了 UserDao
接口的具体实例。这就是Spring框架中的依赖注入(DI)机制。
所以回答最上面的问题,如果就一个实现类实现了接口,根据接口类型可以获取
bean 吗?
是的,如果只有一个实现类实现了接口,并且这个实现类已经在Spring的IoC容器中配置为一个Bean,那么根据接口类型是可以成功获取到对应的Bean实例的。
前提条件:
实现类已经在Spring配置文件(如:bean.xml)中被正确配置为一个Bean。 配置时指定了实现类的全限定名作为 class属性的值。 在IoC容器中根据接口类型获取Bean时,容器中没有其他同样实现了该接口的Bean定义,即接口的实现类在容器中是唯一的。
如果一个接口有多个实现类,这些实现类都配置了
bean,根据接口类型可以获取 bean 吗?
不可以,如果一个接口有多个实现类,并且这些实现类都被配置成了Spring容器中的Bean,那么直接根据接口类型来获取Bean将会抛出NoUniqueBeanDefinitionException异常,因为Spring容器无法确定应该返回哪个Bean实例。
例如,有两个实现类UserDaoImp01和UserDaoImp02都实现了UserDao接口,并且都在Spring配置文件中配置为Bean:
1 2 <bean id ="userDaoImp01" class ="com.ergoutree.interf.UserDaoImp01" /> <bean id ="userDaoImp02" class ="com.ergoutree.interf.UserDaoImp02" />
相当于在Spring的IoC容器中配置了两个相同类型的Bean
依赖注入之 setter 注入
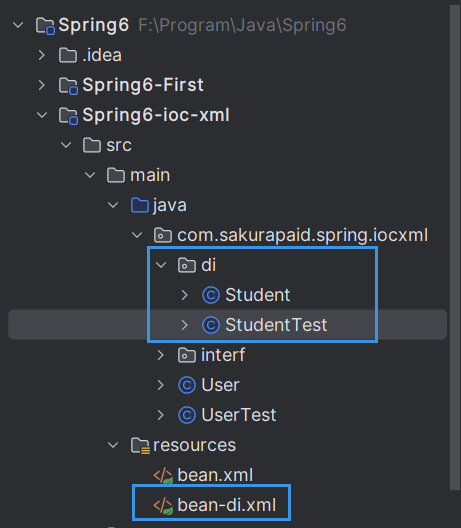
总体结构
img
img
创建学生类Student
1
2
3
4
5
6
7
8
9
10
11
12
13
14
15
16
17
18
19
20
21
22
23
24
25
26
27
28
29
30
31
public class Student { private String name; private int age; public Student () {} public Student (String name, int age) { this .name = name; this .age = age; } public String getName () { return name; } public void setName (String name) { this .name = name; } public int getAge () { return age; } public void setAge (int age) { this .age = age; } public String toString () { return "Student{name = " + name + ", age = " + age + "}" ; } }
bean-di.xml 配置文件
这里的 ******元素对应于****Student****类中的setter方法**
1
2
3
4
5
6
7
8
9
10
11
12
<?xml version="1.0" encoding="UTF-8" ?> <beans xmlns ="http://www.springframework.org/schema/beans" xmlns:xsi ="http://www.w3.org/2001/XMLSchema-instance" xsi:schemaLocation ="http://www.springframework.org/schema/beans http://www.springframework.org/schema/beans/spring-beans.xsd" > <bean id ="student" class ="com.ergoutree.di.Student" > <property name ="name" value ="ergoutree" > </property > <property name ="age" value ="18" > </property > </bean > </beans >
测试类
当Spring容器读取并解析bean-di.xml配置文件时,会创建一个Student实例,并通过调用对应的setter方法(setName
和setAge),将值”ergoutree”注入到name属性,将值18注入到age属性,从而完成依赖注入。
1
2
3
4
5
6
7
8
9
10
11
12
13
public class StudentTest { @Test public void test () { ApplicationContext context = new ClassPathXmlApplicationContext ("bean-di.xml" ); Student student = context.getBean("student" , Student.class); System.out.println(student); } }
依赖注入之构造器注入
在Student类中添加有参构造
1 public Student (String name) {}
配置bean-di.xml
1
2
3
4
5
6
7
8
9
10
11
12
13
14
15
16
17
18
19
<?xml version="1.0" encoding="UTF-8" ?> <beans xmlns ="http://www.springframework.org/schema/beans" xmlns:xsi ="http://www.w3.org/2001/XMLSchema-instance" xsi:schemaLocation ="http://www.springframework.org/schema/beans http://www.springframework.org/schema/beans/spring-beans.xsd" > <bean id ="student" class ="com.ergoutree.di.Student" > <property name ="name" value ="ergoutree" > </property > <property name ="age" value ="18" > </property > </bean > <bean id ="studentcon" class ="com.ergoutree.di.Student" > <constructor-arg name ="name" value ="ergou" > </constructor-arg > <constructor-arg name ="age" value ="19" > </constructor-arg > </bean > </beans >
这里使用了<constructor-arg>标签来指定构造函数的参数。根据注释,我们知道
Student
类应该有一个带有两个参数(name和age)的构造函数,类似于下面的Java代码:
1
2
3
4
5
6
7
8
9
10
11
public class Student { private String name; private int age; public Student (String name, int age ) this .name = name; this .age = age; } }
constructor-arg标签还有两个属性可以进一步描述构造器参数:
index属性:指定参数所在位置的索引(从0开始)
name属性:指定参数名
测试方法
1
2
3
4
5
6
7
8
@Test public void test2 () { ApplicationContext context = new ClassPathXmlApplicationContext ("bean-di.xml" ); Student student = context.getBean("studentcon" , Student.class); System.out.println(student); }
当Spring容器加载并解析XML配置文件时,它会找到studentcon这个bean,并根据<constructor-arg>标签提供的信息,调用
Student
类的相应构造函数,传入”ergou”作为name参数,传入19作为age参数,从而创建并初始化Student实例。
最终,通过context.getBean("studentcon", Student.class)获取到了通过构造器注入生成的Student实例,并将其打印出来。
特殊值处理
某些XML配置片段在Spring框架中的意义
字面量赋值
1 <property name ="name" value ="张三" />
在Spring的XML配置中,<property>标签是用来设置Bean属性值的。这里的value="张三"就是将字面量“张三”赋给名为”name”的属性。这意味着当你在Bean中引用该属性时,它的值就是字符串”张三”,而不是一个变量或者表达式的结果。
设置null值
1 2 3 <property name ="name" > <null /> </property >
这种方式是用来给Bean的属性设置 null
值的。与直接使用value="null"不同,后者会被当作字符串”null”而非实际的Java
null值处理。
<null />标签告诉Spring容器将此属性值设为空引用。
注意下面的这样写法
1 <property name ="name" value ="null" > </property >
这样的写法,为name所赋的值是字符串null
XML实体
1 <property name ="expression" value ="a < b" />
在XML中,“<” 和 “>”
等特殊字符有特殊的含义,它们分别表示标签的开始和结束。如果你想在属性值中包含这样的字符,需要使用XML实体来转义。
例如,XML实体如 < 代替小于号 <
,这样解析器就会知道这是一个小于符号,而不是标签的起始。XML实体如
>代替大于号 >
CDATA节
CDATA(Characters
Data)是一种在XML文档中嵌入大段文本的方式,其中的内容不会被XML解析器解析为标记或实体。在这里,如果你的属性值可能包含大量的特殊字符或者需要包含XML语法结构,为了防止解析错误,可以将这部分内容放在<![CDATA[ ... ]]>之中。因此,<![CDATA[a < b]]>意味着a< b被当作纯文本对待,里面的
"<"字符不会被解析成标签开始。
为对象类型属性赋值
示例
准备工作
img
img
部门类
1
2
3
4
5
6
7
8
9
10
11
12
13
14
15
16
17
package com.ergoutree.diobj;public class Department { private String name; public void sout () { System.out.println("部门名: " + name); } public String getName () { return name; } public void setName (String name) { this .name = name; } }
员工类
1
2
3
4
5
6
7
8
9
10
11
12
13
14
15
16
17
18
19
20
21
22
23
24
25
26
27
28
29
30
31
32
33
34
35
36
package com.ergoutree.diobj;public class Employee { private Department department; private String name; private int age; public void work () { System.out.println("员工: " + name + ",年龄: " + age); department.sout(); } public Department getDepartment () { return department; } public void setDepartment (Department department) { this .department = department; } public String getName () { return name; } public void setName (String name) { this .name = name; } public int getAge () { return age; } public void setAge (int age) { this .age = age; } }
引用外部bean,配置 bean-diobj.xml
<property name="department" ref="department"/>这一行表示:当Spring容器初始化
“employee” 这个 Bean
时,会自动查找ID为”department”的Bean,并将该Bean的实例注入到 Employee
类的 department 属性上,实现了依赖注入。
1 2 3 4 5 6 7 8 9 10 11 12 13 14 15 16 17 18 <bean id ="department" class ="com.ergoutree.diobj.Department" > <property name ="name" value ="开发部" /> </bean > <bean id ="employee" class ="com.ergoutree.diobj.Employee" > <property name ="name" value ="张三" /> <property name ="age" value ="20" /> <property name ="department" ref ="department" /> </bean >
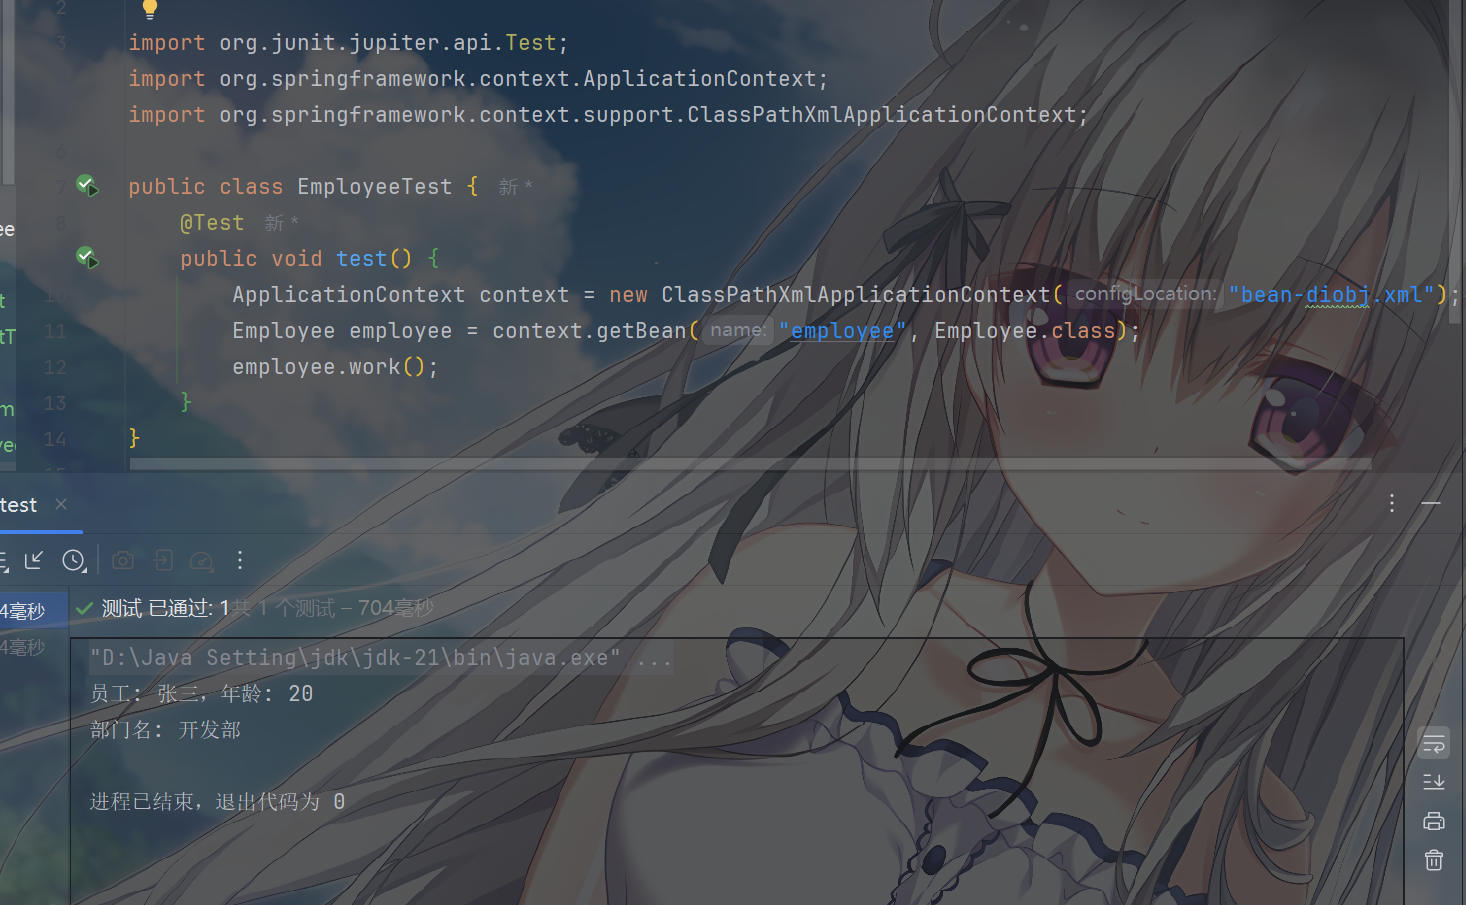
测试输出
在测试类EmployeeTest中,我们通过Spring应用上下文加载XML配置文件,然后获取”employee”这个Bean的实例,并调用其work方法。由于依赖注入已经完成,此时调用employee.work()方法时,不仅会输出员工的基本信息,还会通过注入的department对象输出部门名称。
1
2
3
4
5
6
7
8
9
10
11
12
import org.junit.jupiter.api.Test;import org.springframework.context.ApplicationContext;import org.springframework.context.support.ClassPathXmlApplicationContext; public class EmployeeTest { @Test public void test () { ApplicationContext context = new ClassPathXmlApplicationContext ("bean-diobj.xml" ); Employee employee = context.getBean("employee" , Employee.class); employee.work(); } }
总结起来,这种引用外部 bean 的方式就是在配置文件中通过 ref
属性指定了依赖对象,Spring
容器负责自动装配这些依赖关系,使得类之间的耦合度降低,提高了程序的可维护性和灵活性。
内部bean
内部bean(Inner
Bean)是在Spring配置文件中直接定义并初始化的一个Bean,它不是顶级Bean(Root
Bean),而是作为另一个Bean的属性值出现。在给出的示例中,我们展示了如何通过内部bean的方式来注入Employee类的department属性。
在bean配置上和内部bean有所区别,但能达到一样的效果
在XML配置文件中,对于employee2这个Bean的定义,我们不再通过ref属性引用已经定义好的外部Bean,而是直接在其department属性内部定义一个新的Department
Bean。
这里的新Department
Bean没有显式定义ID,因为它是一个内部Bean,由Spring容器自动生成一个唯一的ID。同时,它拥有自己的属性设置,如name属性被设置为”开发部”。
1
2
3
4
5
6
7
8
9
10
11
12
13
14
15
16
17
18
19
20
21
22
23
24
25
26
27
<?xml version="1.0" encoding="UTF-8" ?> <beans xmlns ="http://www.springframework.org/schema/beans" xmlns:xsi ="http://www.w3.org/2001/XMLSchema-instance" xsi:schemaLocation ="http://www.springframework.org/schema/beans http://www.springframework.org/schema/beans/spring-beans.xsd" > <bean id ="department" class ="com.sakurapaid.spring.iocxml.diobj.Department" > <property name ="name" value ="开发部" /> </bean > <bean id ="employee1" class ="com.sakurapaid.spring.iocxml.diobj.Employee" > <property name ="name" value ="张三" /> <property name ="age" value ="20" /> <property name ="department" ref ="department" /> </bean > <bean id ="employee2" class ="com.sakurapaid.spring.iocxml.diobj.Employee" > <property name ="name" value ="张三" /> <property name ="age" value ="20" /> <property name ="department" > <bean class ="com.sakurapaid.spring.iocxml.diobj.Department" > <property name ="name" value ="开发部" /> </bean > </property > </bean > </beans >
当Spring容器加载配置文件并初始化 employee2 这个Bean时,它会发现
department 属性需要注入一个 Department 类型的 Bean
。于是,它会在当前上下文中查找匹配的 Bean 定义,发现内部定义的
Department Bean,然后创建并初始化这个内部 Bean,并将其实例注入到
employee2 的 department 属性上。
在测试类 EmployeeTest 中,我们仅获取并操作了使用内部 bean 方式注入的
Employee 实例(employee2),同样能够达到与外部 bean
方式相同的效果,即输出员工基本信息以及所属部门名称。
内部 bean 方式的优势在于可以在同一个配置块内清晰地展示和组织 Bean
之间的依赖关系,简化配置文件结构。但在某些场景下,如果某个 Bean
会被多个其他 Bean 共享,使用外部 bean 并通过 ref 引用则更为合适。
1
2
3
4
5
6
7
8
9
10
11
12
import org.junit.jupiter.api.Test;import org.springframework.context.ApplicationContext;import org.springframework.context.support.ClassPathXmlApplicationContext; public class EmployeeTest { @Test public void test () { ApplicationContext context = new ClassPathXmlApplicationContext ("bean-diobj.xml" ); Employee employee = context.getBean("employee2" , Employee.class); employee.work(); } }
级联属性赋值
不常用
1
2
3
4
5
6
7
8
9
10
11
12
13
14
15
16
17
18
19
20
21
22
23
24
25
26
27
28
29
30
31
32
33
34
35
36
37
38
39
40
<?xml version="1.0" encoding="UTF-8" ?> <beans xmlns ="http://www.springframework.org/schema/beans" xmlns:xsi ="http://www.w3.org/2001/XMLSchema-instance" xsi:schemaLocation ="http://www.springframework.org/schema/beans http://www.springframework.org/schema/beans/spring-beans.xsd" > <bean id ="department" class ="com.sakurapaid.spring.iocxml.diobj.Department" > <property name ="name" value ="开发部" /> </bean > <bean id ="employee1" class ="com.sakurapaid.spring.iocxml.diobj.Employee" > <property name ="name" value ="张三" /> <property name ="age" value ="20" /> <property name ="department" ref ="department" /> </bean > <bean id ="employee2" class ="com.sakurapaid.spring.iocxml.diobj.Employee" > <property name ="name" value ="张三" /> <property name ="age" value ="20" /> <property name ="department" > <bean class ="com.sakurapaid.spring.iocxml.diobj.Department" > <property name ="name" value ="开发部" /> </bean > </property > </bean > <bean id ="department3" class ="com.sakurapaid.spring.iocxml.diobj.Department" > <property name ="name" value ="开发部" /> </bean > <bean id ="employee3" class ="com.sakurapaid.spring.iocxml.diobj.Employee" > <property name ="name" value ="张三" /> <property name ="age" value ="20" /> <property name ="department" ref ="department3" /> <property name ="department.name" value ="测试部" /> </bean > </beans >
级联属性赋值是针对对象类型属性的进一步操作,当一个 Bean
的属性是另一个对象类型时,我们不仅可以为这个对象属性赋值,还可以直接为该对象属性的内部属性进行赋值。
在单独的 <bean>标签中,把 bean 对象所依赖的类通过
<property> 中标出,也是使用 ref
级联属性赋值时,要确保被赋值的对象属性已经正确实例化
级联属性赋值的优先级高于直接在被引用的 Bean
中设置的属性值,即后配置的值会覆盖前面已配置的值。
为数组类型属性赋值
修改Employee员工类
主要是新增了数组成员和及其输出
1
2
3
4
5
6
7
8
9
10
11
12
13
14
15
16
17
18
19
20
21
22
23
24
25
26
27
28
29
30
31
32
33
34
35
36
37
38
39
40
41
42
43
44
45
46
47
48
49
50
51
52
53
54
55
56
57
58
public class Employee { private Department department; private String name; private int age; private String[] hobby; public Employee () {} public Employee (Department department, String name, int age, String[] hobby) { this .department = department; this .name = name; this .age = age; this .hobby = hobby; } public void work () { System.out.println("员工: " + name + ",年龄: " + age); department.sout(); System.out.println(Arrays.toString(hobby)); } public Department getDepartment () { return department; } public void setDepartment (Department department) { this .department = department; } public String getName () { return name; } public void setName (String name) { this .name = name; } public int getAge () { return age; } public void setAge (int age) { this .age = age; } public String[] getHobby() { return hobby; } public void setHobby (String[] hobby) { this .hobby = hobby; } public String toString () { return "Employee{department = " + department + ", name = " + name + ", age = " + age + ", hobby = " + hobby + "}" ; } }
编辑 spring 配置文件
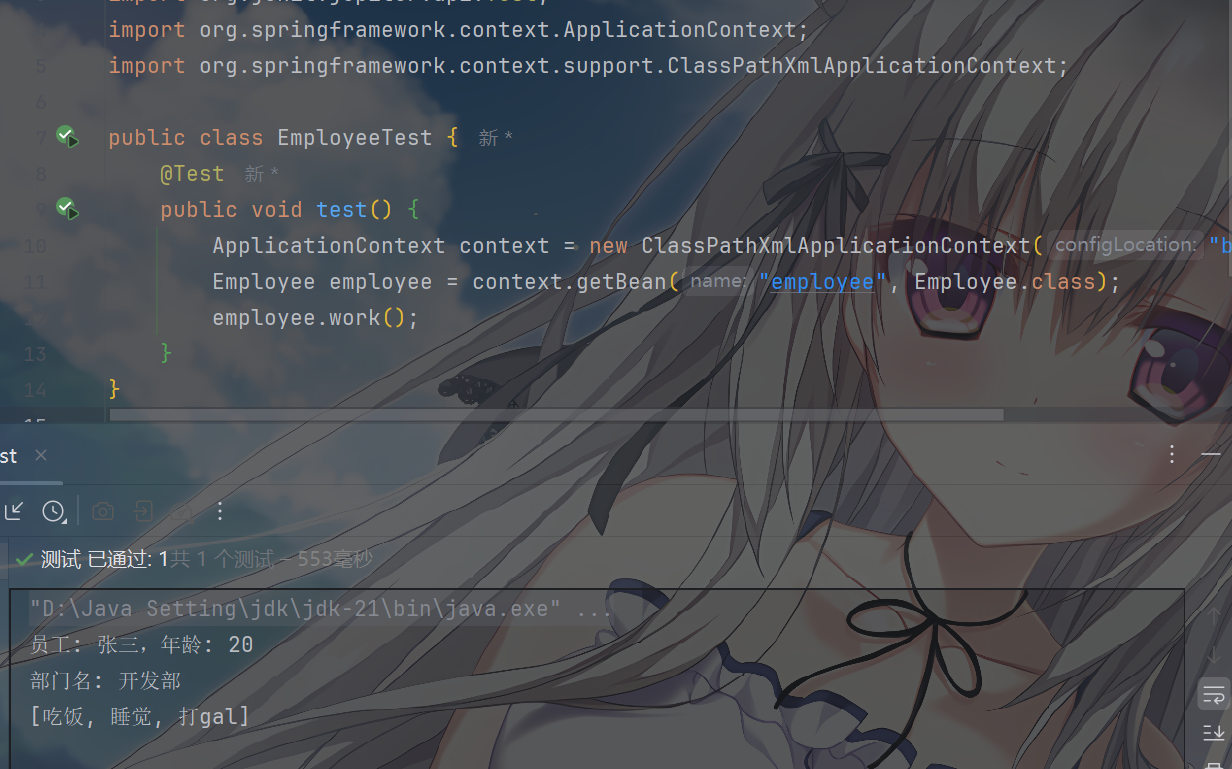
<property>标签用于设置 Employee
类中对应的属性值。对于数组类型的"hobby"属性,我们使用了<array>标签来进行嵌套注入。在<array>标签内部,通过多个<value>标签来分别指定数组中的每个元素值。
所以当Spring容器创建"employee"这个 Bean
时,它会自动将这些值注入到 Employee 对象的 “hobby”
数组属性中,最终得到的数组内容即为 [“吃饭”, “睡觉”, “打gal”] 。
1
2
3
4
5
6
7
8
9
10
11
12
13
14
15
16
17
18
19
20
21
22
23
24
25
26
27
28
29
30
31
<?xml version="1.0" encoding="UTF-8" ?> <beans xmlns ="http://www.springframework.org/schema/beans" xmlns:xsi ="http://www.w3.org/2001/XMLSchema-instance" xsi:schemaLocation ="http://www.springframework.org/schema/beans http://www.springframework.org/schema/beans/spring-beans.xsd" > <bean id ="department" class ="com.ergoutree.diobj.Department" > <property name ="name" value ="开发部" /> </bean > <bean id ="employee" class ="com.ergoutree.diobj.Employee" > <property name ="name" value ="张三" /> <property name ="age" value ="20" /> <property name ="department" ref ="department" /> <property name ="hobby" > <array > <value > 吃饭</value > <value > 睡觉</value > <value > 打gal</value > </array > </property > </bean > </beans >
测试输出
image-20250420202752367
image-20250420202752367
为集合类型属性赋值
为 List 集合类型属性赋值
修改Department部门类
多了个List集合,一个部门有很多人,再定义个输出方法
1
2
3
4
5
6
7
8
9
10
11
12
13
14
15
16
17
18
19
20
21
22
23
24
25
26
27
28
29
30
31
32
import java.util.List;public class Department { private List<Employee> employees; private String name; public void sout () { System.out.println("部门名: " + name); for (Employee emp : employees){ System.out.println(emp.getName()); } } public String getName () { return name; } public void setName (String name) { this .name = name; } public List<Employee> getEmployees () { return employees; } public void setEmployees (List<Employee> employees) { this .employees = employees; } }
定义 Spring 配置文件
两个员工 bean 和一个部门 bean
在 XML 配置文件中,首先定义了两个 Employee 类型的
Bean(emp1和emp2),它们分别具有不同的属性值,包括名字、年龄和兴趣爱好列表(hobby)。这里的
hobby
属性是一个列表类型,使用<list>标签进行配置,通过多个<value>子标签为列表添加元素。
然后,定义了一个 Department 类型的
Bean(dept),它具有一个名字属性和一个 employees 集合属性。employees
属性也是一个列表类型,用于存放 Department 下的多个 Employee
对象。这里使用<list>标签,并通过<ref>子标签引用前面定义好的
Employee Bean(emp1和emp2),从而将这两个 Employee 对象注入到 Department
的 employees 集合属性中。
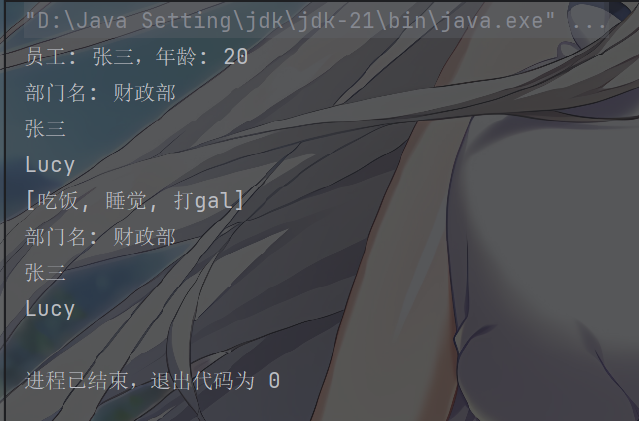
1
2
3
4
5
6
7
8
9
10
11
12
13
14
15
16
17
18
19
20
21
22
23
24
25
26
27
28
29
30
31
32
33
34
35
36
37
38
39
40
41
42
43
44
45
46
47
48
49
50
51
52
53
54
55
56
57
58
59
60
61
62
63
<?xml version="1.0" encoding="UTF-8" ?> <beans xmlns ="http://www.springframework.org/schema/beans" xmlns:xsi ="http://www.w3.org/2001/XMLSchema-instance" xsi:schemaLocation ="http://www.springframework.org/schema/beans http://www.springframework.org/schema/beans/spring-beans.xsd" > <bean id ="department" class ="com.ergoutree.diobj.Department" > <property name ="name" value ="开发部" /> </bean > <bean id ="emp1" class ="com.ergoutree.diobj.Employee" > <property name ="name" value ="张三" /> <property name ="age" value ="20" /> <property name ="department" ref ="dept" /> <property name ="hobby" > <array > <value > 吃饭</value > <value > 睡觉</value > <value > 打gal</value > </array > </property > </bean > <bean id ="emp2" class ="com.ergoutree.diobj.Employee" > <property name ="name" value ="Lucy" /> <property name ="age" value ="21" /> <property name ="hobby" > <list > <value > 睡觉</value > <value > 学习</value > <value > 吃饭</value > </list > </property > </bean > <bean id ="dept" class ="com.ergoutree.diobj.Department" > <property name ="name" value ="财政部" /> <property name ="employees" > <list > <ref bean ="emp1" /> <ref bean ="emp2" /> </list > </property > </bean > </beans >
测试输出
1
2
3
4
5
6
7
8
9
10
11
12
13
14
15
import org.junit.jupiter.api.Test;import org.springframework.context.ApplicationContext;import org.springframework.context.support.ClassPathXmlApplicationContext;public class EmployeeTest { @Test public void test () { ApplicationContext context = new ClassPathXmlApplicationContext ("bean-diobj.xml" ); Employee employee = context.getBean("emp1" , Employee.class); employee.work(); Department dept = context.getBean("dept" , Department.class); dept.sout(); } }
image-20250420203805345
image-20250420203805345
为Map集合类型赋值
修改 student 类,添加一个 Map
类型的属性,用于存储学生的课程和对应的成绩
1
2
3
4
5
6
7
8
9
10
11
12
13
14
15
16
17
18
19
20
21
22
23
24
25
26
27
28
29
30
31
32
33
34
35
36
37
38
39
40
41
42
43
44
45
46
47
48
49
50
51
52
53
package com.ergoutree.di;import java.util.Map;public class Student { private String name; private int age; private Map<String, Integer> scores; public Student () { } public Student (String name, int age) { this .name = name; this .age = age; } public Student (String name) {} public String getName () { return name; } public void setName (String name) { this .name = name; } public int getAge () { return age; } public void setAge (int age) { this .age = age; } public Map<String, Integer> getScores () { return scores; } public void setScores (Map<String, Integer> scores) { this .scores = scores; } @Override public String toString () { return "Student{name='" + name + "', scores=" + scores + "}" ; } }
修改 bean-di.xml
1 2 3 4 5 6 7 8 9 10 11 12 13 <bean id ="student2" class ="com.ergoutree.di.Student" > <property name ="name" value ="张三" /> <property name ="scores" > <map > <entry key ="数学" value ="90" /> <entry key ="英语" value ="85" /> <entry key ="语文" value ="88" /> </map > </property > </bean >
<map> 标签Map 集合,在 标签内部使用 标签来定义
Map 中的键值对。<entry> 标签key
属性指定键,value
属性指定值。这里的键和值都是基本数据类型(字符串和整数)键和值的类型 :在 <entry>
标签中,key 和 value 属性的值会根据 Bean
属性的类型自动进行类型转换。如果键或值是复杂对象,你可以使用
key-ref 和 value-ref 引用其他 Bean。
测试
1
2
3
4
5
6
7
8
@Test public void test3 () { ApplicationContext context = new ClassPathXmlApplicationContext ("bean-di.xml" ); Student student = context.getBean("student2" , Student.class); System.out.println(student); }
引用集合类型的 bean
修改学生类
新增一个 List 集合,管理课程
1
2
3
4
5
6
7
8
9
10
11
12
13
14
15
16
17
18
19
20
21
22
23
24
25
26
27
28
29
30
31
32
33
34
35
36
37
38
39
40
41
42
43
44
45
46
47
48
49
50
51
52
53
54
55
56
57
58
59
60
61
62
63
64
65
package com.ergoutree.di;import java.util.*;public class Student { private String name; private int age; private Map<String, Integer> scores; private int stu_id; private List<Lesson> listLessons; public Student () { } public Student (String name, int age) { this .name = name; this .age = age; } public void sout () { System.out.println("学生id : " + stu_id + ", " + "学生姓名 : " + name); System.out.println(); System.out.print("课程集合 : " ); for (Lesson lesson : listLessons){ System.out.print(lesson.getLessonName() + " " ); } } public Student (String name) {} public String getName () { return name; } public void setName (String name) { this .name = name; } public int getAge () { return age; } public void setAge (int age) { this .age = age; } public Map<String, Integer> getScores () { return scores; } public void setScores (Map<String, Integer> scores) { this .scores = scores; } @Override public String toString () { return "Student{name='" + name + "', scores=" + scores + "}" ; } }
对应的Lesson类
1
2
3
4
5
6
7
8
9
10
11
public class Lesson { private String lessonName; public String getLessonName () { return lessonName; } public void setLessonName (String lessonName) { this .lessonName = lessonName; } }
配置Spring文件
使用util:list、util:map标签必须引入相应的命名空间
代码样式放在上的,需要用时直接复制粘贴即可
1
2
3
4
5
6
7
8
<?xml version="1.0" encoding="UTF-8" ?> <beans xmlns ="http://www.springframework.org/schema/beans" xmlns:xsi ="http://www.w3.org/2001/XMLSchema-instance" xmlns:util ="http://www.springframework.org/schema/util" xsi:schemaLocation ="http://www.springframework.org/schema/util http://www.springframework.org/schema/util/spring-util.xsd http://www.springframework.org/schema/beans http://www.springframework.org/schema/beans/spring-beans.xsd" >
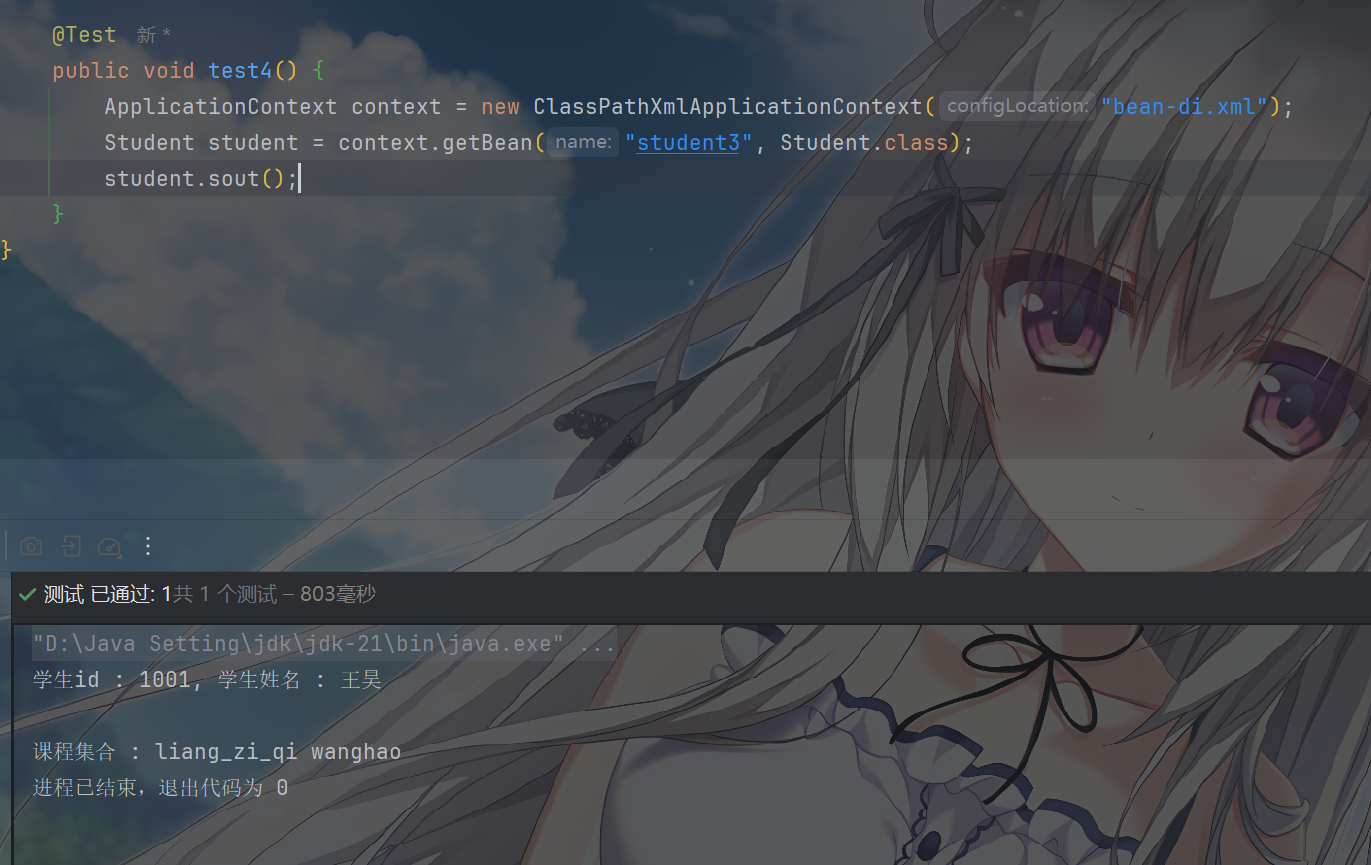
1 2 3 4 5 6 7 8 9 10 11 12 13 14 15 16 17 18 19 20 21 22 23 24 25 26 27 28 29 30 31 32 33 34 35 36 37 38 39 40 <bean id ="studentcon" class ="com.ergoutree.di.Student" > <constructor-arg name ="name" value ="ergou" > </constructor-arg > <constructor-arg name ="age" value ="19" > </constructor-arg > </bean > <bean id ="student2" class ="com.ergoutree.di.Student" > <property name ="name" value ="张三" /> <property name ="scores" > <map > <entry key ="数学" value ="90" /> <entry key ="英语" value ="85" /> <entry key ="语文" value ="88" /> </map > </property > </bean > <bean id ="student3" class ="com.ergoutree.di.Student" > <property name ="stu_id" value ="1001" > </property > <property name ="name" value ="王昊" > </property > <property name ="listLessons" ref ="listlessons" > </property > </bean > <bean id ="lesson1" class ="com.ergoutree.di.Lesson" > <property name ="lessonName" value ="liang_zi_qi" > </property > </bean > <bean id ="lesson2" class ="com.ergoutree.di.Lesson" > <property name ="lessonName" value ="wanghao" > </property > </bean > <util:list id ="listlessons" > <ref bean ="lesson1" > </ref > <ref bean ="lesson2" > </ref > </util:list >
测试
1
2
3
4
5
6
7
8
9
10
11
12
13
14
15
import org.junit.jupiter.api.Test;import org.springframework.context.ApplicationContext;import org.springframework.context.support.ClassPathXmlApplicationContext; public class MapAndListTest { @Test public void test () { ApplicationContext context = new ClassPathXmlApplicationContext ("bean-diMapAndList.xml" ); Student student = context.getBean("student" , Student.class); student.sout(); } }
image-20250421163559144
image-20250421163559144
由于篇幅太长,转到 下篇