
Vue3项目搭建
vue create 搭建新项目
我们在前面了解了 Vue 项目的构建方式有很多种,但是创建一个 Vue 项目我们通常使用
别忘了
1 | npm install -g @vue/cli |
注意:安装 vue-cli 对 node.js 的版本是有要求的
然后 vue create 项目名称即可
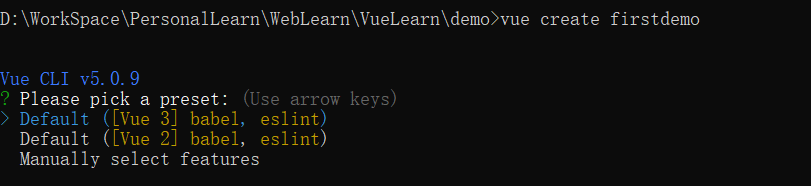
这里会让你选择 vue 的版本,默认是3
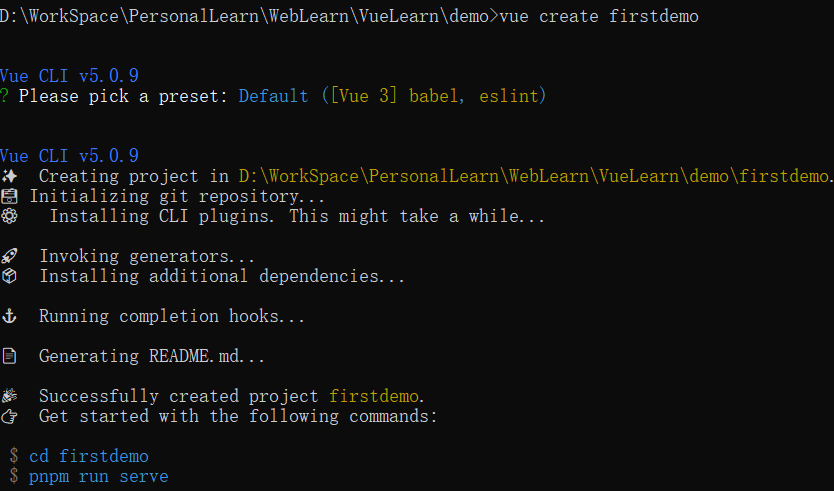
然后你可以 npm install,然后 npm run dev 启动了就
但是要明确的是,这种通过 @vue/cli(Vue
CLI)构建项目的方式不是使用 Vite。
Vue CLI 是 Vue 官方早期推出的项目脚手架工具,基于 Webpack 构建;而 Vite 是后来推出的新一代构建工具,采用了更高效的原生 ES 模块加载方式,现在也被 Vue 官方推荐用于新项目构建。
使用vite构建vue3项目
确保你的开发环境满足以下要求:
- Node.js:版本 ≥ 14.18.0(推荐 16+,可通过
node -v查看版本) - 包管理器:
npm(Node 自带)、yarn或pnpm
Vite 提供了官方的项目脚手架命令,可快速生成 Vue 3 项目模板。
1 | # npm 6.x |
my-vue-app是项目名称--template vue指定使用 Vue 模板。如需使用 TypeScript,可替换为 vue-ts。- 查看 create-vite
以获取每个模板的更多细节:
vanilla,vanilla-ts,vue,vue-ts,react,react-ts,preact,preact-ts,lit,lit-ts,svelte,svelte-ts。
快速搭建就是
1 | npm create vue@latest |
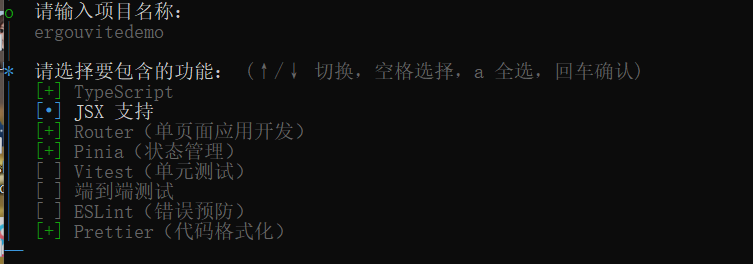
执行后会出现交互式配置选项,按提示选择即可:
Project name:输入项目名称(如
vite-vue3-demo)
Add TypeScript?:是否添加 TypeScript(按需选择,这里以 JavaScript 为例,输入空格)
Add JSX Support?:是否支持 JSX(按需选择)
Add Vue Router for Single Page Application development?:是否添加路由(推荐选,用于页面跳转)
Add Pinia for state management?:是否添加 Pinia(Vue 官方状态管理库,替代 Vuex,推荐选 )
Add Vitest for Unit Testing?:是否添加单元测试(按需选择)
Add Cypress for both Unit and E2E testing?:是否添加 E2E 测试(按需选择)
Add ESLint for code quality?:是否添加代码规范检查(推荐选 ,保证代码风格统一)
选择实验特性

这些特性自己查一下按需要选择吧
示例代码
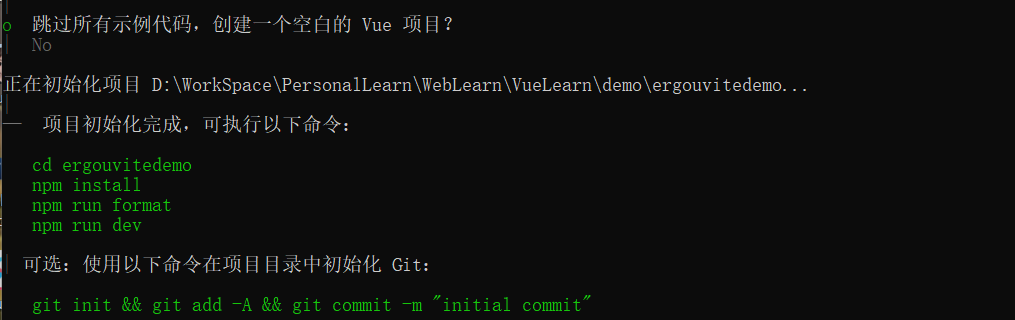
到这里就算是搭建完成了
使用 yarn 或 pnpm 创建(略有不同)
若使用yarn
1
yarn create vue
若使用pnpm
1
pnpm create vue
后续交互步骤与 npm 方式一致。
Vite介绍
Vite简介
Vite 是一个现代化的前端构建工具,旨在通过利用现代浏览器的原生 ES 模块支持,提供快速的开发体验。
Vite 由两部分组成:
- 开发服务器: 基于原生 ES 模块,提供超快的热更新。
- 构建命令: 使用 Rollup 打包代码,生成适用于生产环境的优化静态资源。
Vite 需要 Node.js 版本 18+ 或 20+。然而,有些模板需要依赖更高的 Node 版本才能正常运行,当你的包管理器发出警告时,请注意升级你的 Node 版本。
在 Vite 出现之前,前端开发通常使用 Webpack 等构建工具
- 启动速度慢: 项目越大,启动时间越长,影响开发效率。
- 热更新慢: 每次修改代码后,都需要重新构建整个项目,导致热更新速度慢。
- 配置复杂: Webpack 等工具配置复杂
Vite 的出现解决了传统构建工具的痛点,具有以下优势:
- 极速启动: 利用浏览器原生 ES 模块支持,无需打包,启动速度极快。
- 快速热更新: 仅更新修改的模块,保持应用状态,提升开发效率。
- 丰富的功能: 支持 TypeScript、JSX、CSS 等,开箱即用。
- 高度可扩展: 通过插件系统,轻松集成其他工具和框架。
对比一下二者的启动
graph LR
A[传统工具] --> B[全量打包] --> C[启动服务器]
D[Vite] --> E[直接启动服务器] --> F[按需编译]而且Vite 默认支持:
- TypeScript(无需额外配置)
- JSX/TSX
- CSS(包括 CSS Modules)
- 静态资源处理
- JSON 导入
- Web Assembly
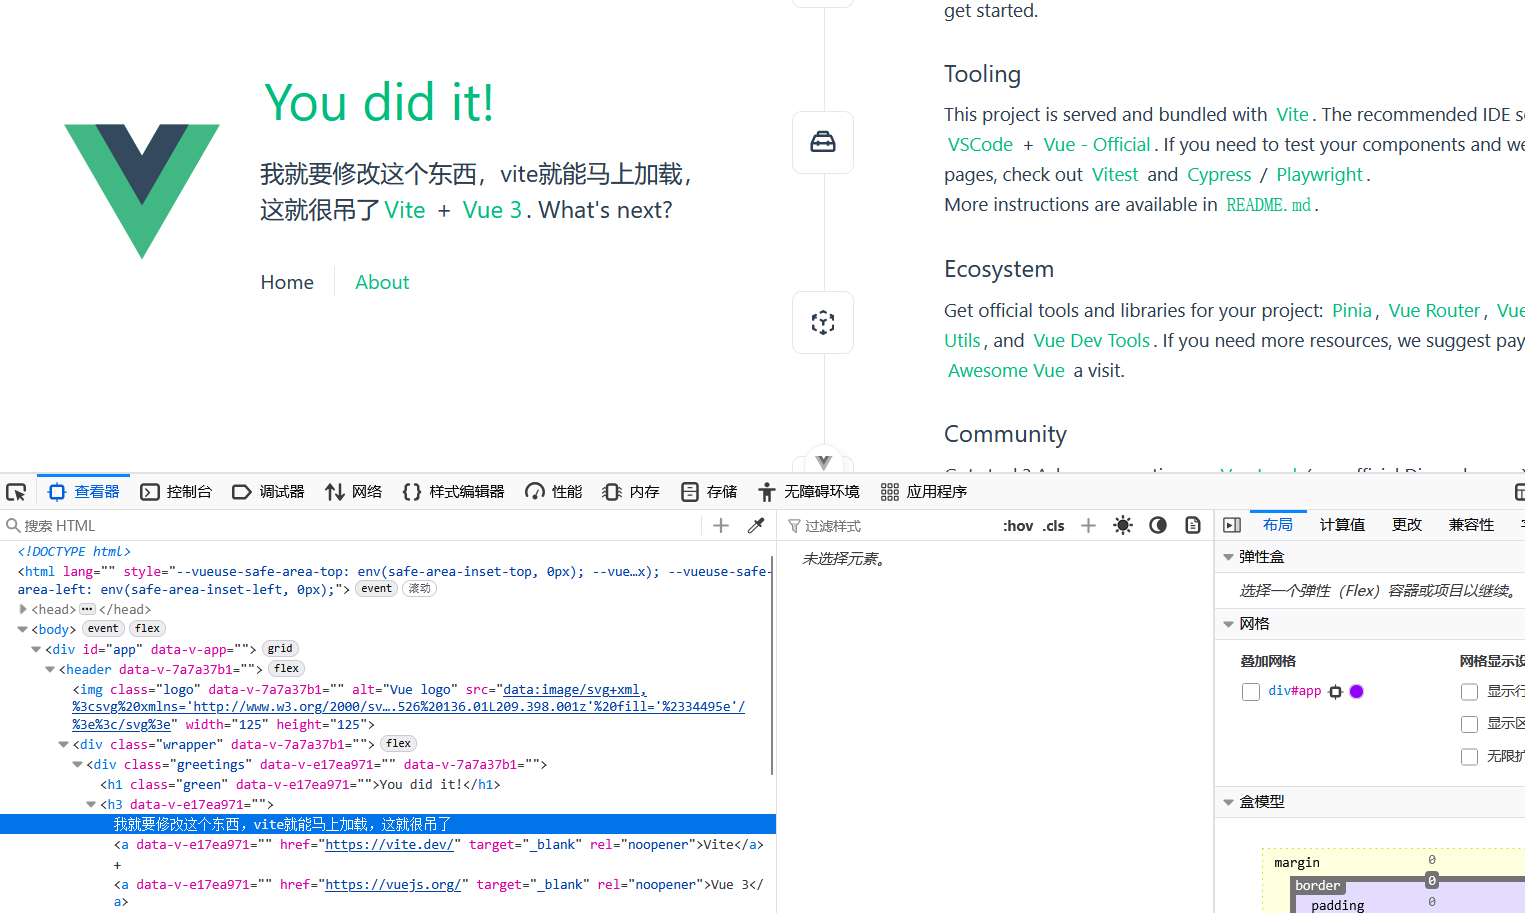
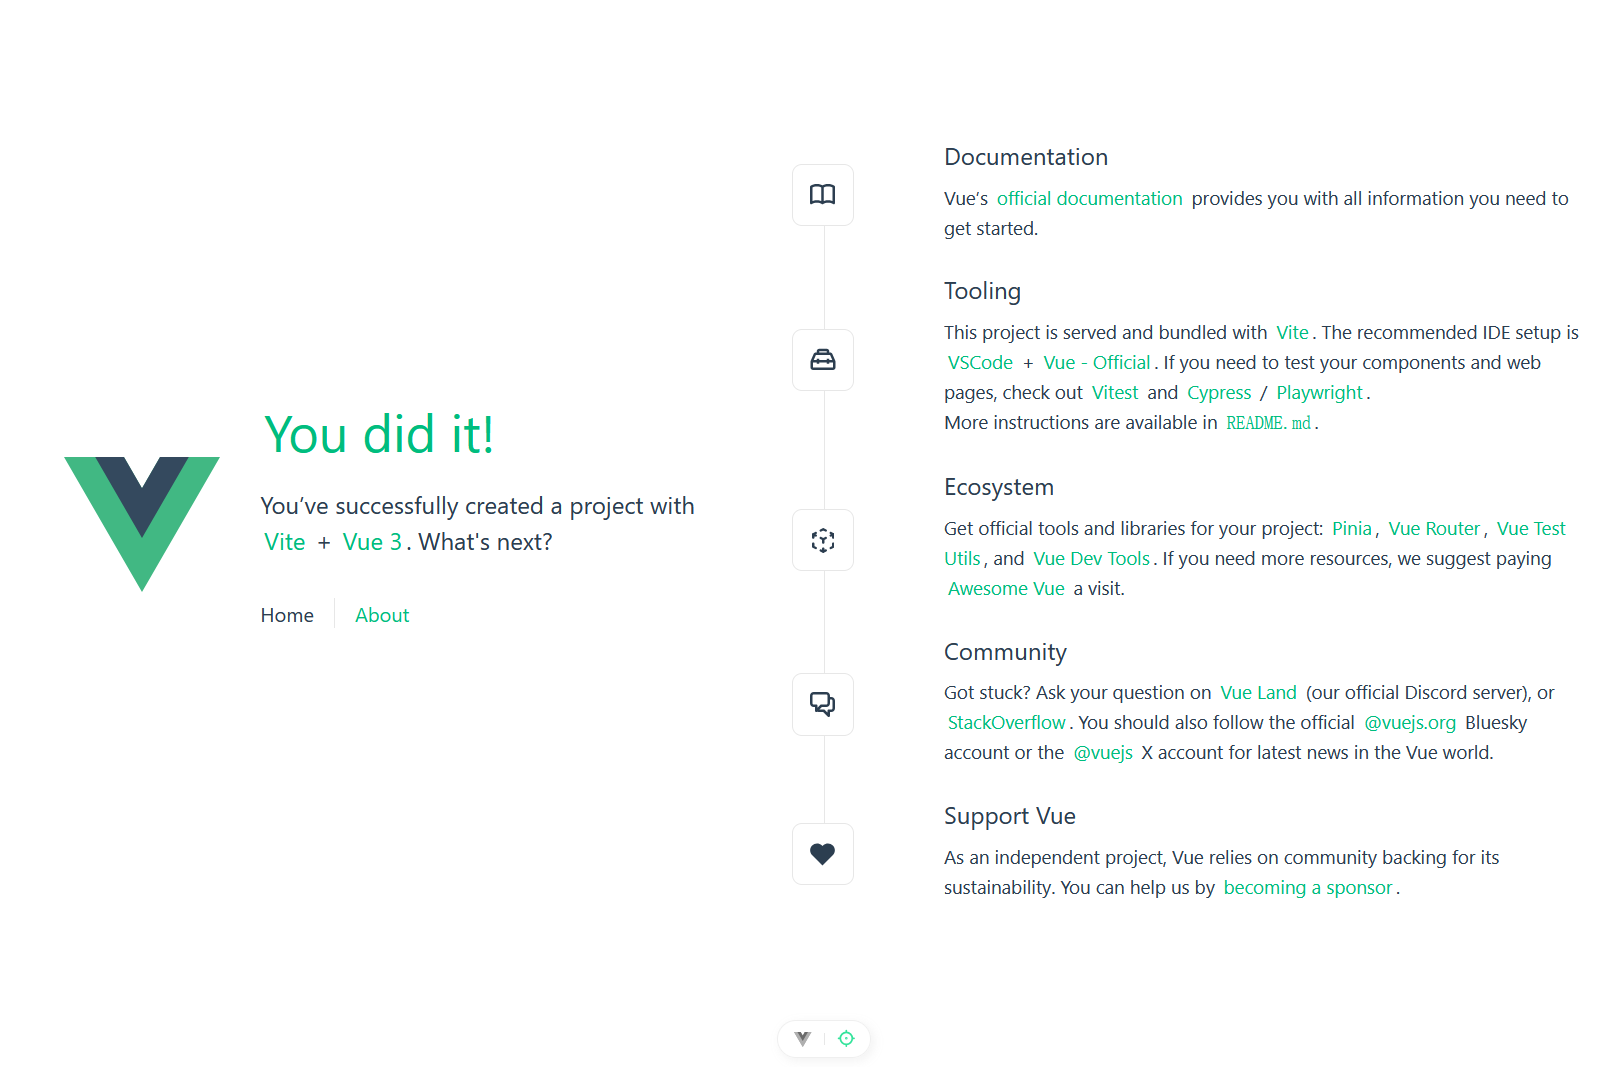
我们启动项目

修改代码你会发现浏览器会自动刷新,并显示修改后的效果。
Vite 的工作原理
Vite 的核心创新在于按需编译和原生 ES 模块的利用,它将构建过程分为两个不同的阶段,因此Vite 的工作原理可以分为开发模式和生产模式:
开发环境
Vite 开发服务器不进行完整打包,而是利用浏览器原生的 ES 模块支持:
- Vite 启动一个开发服务器,利用浏览器原生支持 ES 模块的特性,直接加载源代码。
- 当代码发生变化时,Vite 只会更新修改的模块,并通知浏览器进行热更新,保持应用状态。
工作流程:
- 浏览器请求模块时,Vite 才会按需编译该模块
- 使用 esbuild(Go 编写)预构建依赖,速度比 JavaScript 工具快 10-100 倍
- 通过 HTTP 请求拦截,实时编译文件并返回给浏览器
热更新机制:
- 使用原生 ESM 的模块图,只更新修改的模块
- Vue 组件热更新时能保留组件状态
- CSS 更新时无需刷新页面
生产环境
Vite 使用 Rollup 打包代码,生成优化后的静态资源文件。这些文件可以部署到任何静态文件服务器上。
优化策略:
- 代码分割(Code Splitting)
- 预加载指令生成
- 静态资源处理
- CSS 提取和优化
Vite 的启动过程核心步骤
- 读取配置
- 默认读取根目录下的
vite.config.js或vite.config.ts。 - 配置包括
root、alias、插件、端口等。
- 默认读取根目录下的
- 解析依赖
- 扫描
src/main.js(或src/main.ts)作为入口文件。 - 对 ES 模块进行依赖分析。
- 对导入路径(如
@/components/Hello.vue)进行别名解析。
- 扫描
- 启动开发服务器
- 创建一个 HTTP 服务器,默认端口
5173。 - 提供热更新(HMR, Hot Module Replacement)能力。
- 将 Vue 文件、JS/TS、CSS 等通过内置的 Vite 插件转换成浏览器可识别的代码。
- 创建一个 HTTP 服务器,默认端口
文件调用顺序如下
1 | npm run dev |
使用 Vite 创建的项目结构
使用 Vite 创建的项目通常包含以下文件和文件夹:

由于我还没装依赖,所以没有 node_modules,也就是存放项目依赖的文件夹。
public 是存放静态资源的文件夹,例如图片、字体等。和前面说的一样
src是存放项目源代码的文件夹。
- main.js 是项目入口文件。
- App.vue 是Vue 项目根组件。
index.html是项目首页。
首先,
vite以当前工作目录作为根目录启动开发服务器。你也可以通过vite serve some/sub/dir来指定一个替代的根目录。你可能发现,Vite 将
index.html放在项目根目录而非public文件夹,这一设计有以下核心原因在 Vite 中,
index.html不再只是一个静态文件,而是整个应用的模块入口:1
2
3
4
5
6
7
8<!-- 根目录下的 index.html -->
<html>
<body>
<!-- Vite 会解析这个模块引用,构建整个依赖图 -->
<script type="module" src="/src/main.js"></script>
</body>
</html>- Vite 从这个文件开始解析所有的导入关系
- 它会处理
<script type="module">、<link href>等资源引用 - 这种设计让 Vite 能够按需加载模块,实现极速启动
Vite 在开发时本质上是一个开发服务器,而不止步于传统的构建工具:
- 当你运行
npm run dev时,Vite 启动一个服务器,index.html就是这个服务器的根路由 (/) 对应的文件 - 这类似于传统的静态文件服务器,但功能更强大(支持模块解析、热更新等)
- 浏览器请求
index.html,Vite 处理其中的模块引用,按需编译并返回
- 当你运行
而且 Vite 将
index.html视为源码和模块图的一部分。Vite 解析
<script type="module" src="...">,这个标签指向你的 JavaScript 源码。甚至内联引入 JavaScript 的<script type="module">和引用 CSS 的<link href>也能利用 Vite 特有的功能被解析。另外,index.html中的 URL 将被自动转换,因此不再需要%PUBLIC_URL%占位符了。Vite 天然支持多页面应用,只需在根目录创建多个 HTML 文件
1
2
3
4
5
6project/
├── index.html <!-- 主页 -->
├── about.html <!-- 关于页 -->
└── src/
├── main.js
└── about.js- 访问
/会加载index.html - 访问
/about.html会加载about.html
- 访问
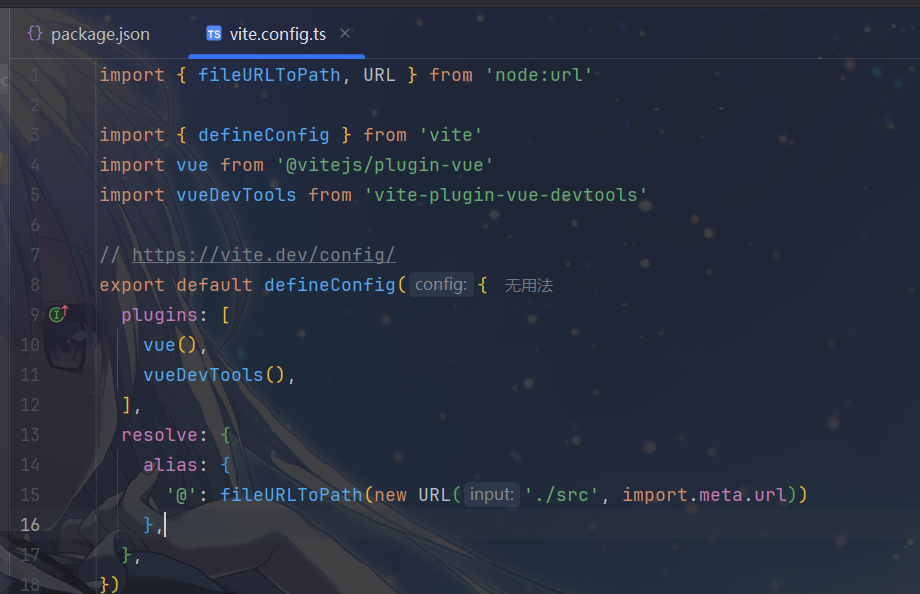
vite.config.js是 Vite 配置文件,用于配置 Vite 的各种选项。
- 这里只简单说一下,详细的配置下面再说,其中
- 导入依赖部分
- 导入了 Vite 核心函数
defineConfig用于类型安全地定义配置 - 导入了 Vue 官方插件
@vitejs/plugin-vue以支持 Vue 单文件组件 - 导入了
vite-plugin-vue-devtools用于增强 Vue 开发工具功能 - 导入了 Node.js 的
url模块相关工具,用于处理路径
- 导入了 Vite 核心函数
- 插件配置(
plugins)vue():启用 Vue 支持,让 Vite 能够处理.vue单文件组件vueDevTools():启用 Vue 开发者工具增强插件,提供更好的调试体验
- 路径解析配置(
resolve.alias)- 定义了路径别名
@指向src目录 - 这样在项目中可以用
@/components/xxx代替../src/components/xxx等相对路径,更简洁且不易出错
- 定义了路径别名
- 导入依赖部分
package.json 是项目配置文件,包含项目信息、依赖和脚本命令。
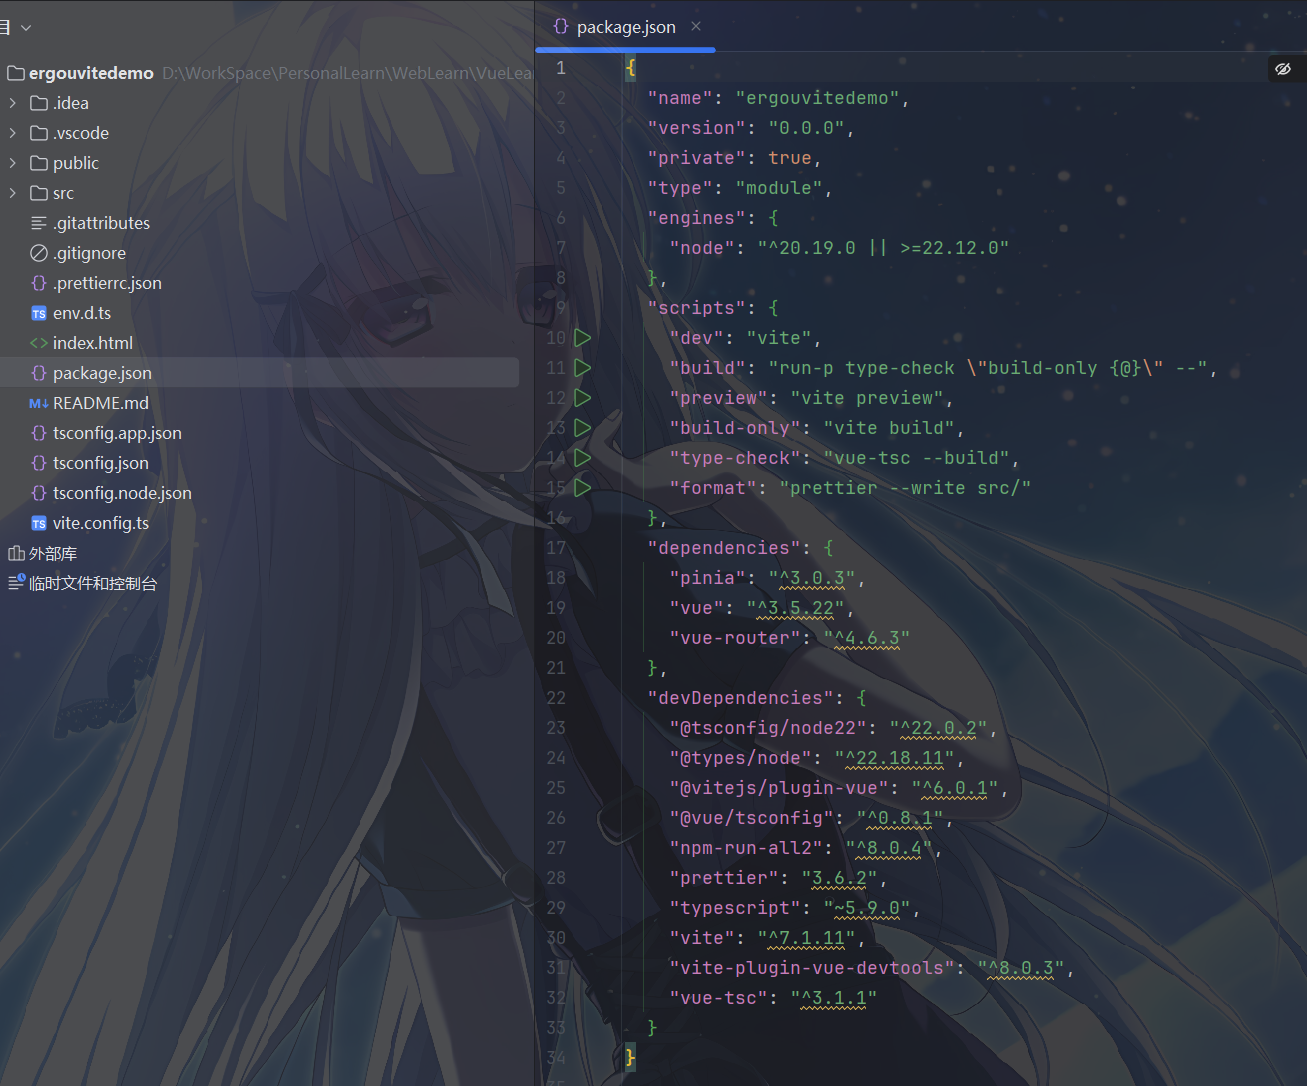
注意,
package.json是 Node.js 项目的核心配置文件,用于管理项目依赖和脚本命令,不管 Vue 怎么构建的什么的只要基于nodejs都会有其中基础信息如下
1
2
3
4
5
6
7
8
9
10{
"name": "ergouvitedemo", // 项目名称
"version": "0.0.0", // 项目版本
"private": true, // 设为 true 表示该项目是私有项目,不会被发布到 npm 仓库
"type": "module", // 表示项目使用 ES 模块规范(而非 CommonJS)
"engines": {
"node": "^20.19.0 || >=22.12.0" // 规定运行该项目所需的 Node.js 版本范围
},
// ...
}scripts是脚本命令用于定义可通过包管理器(如
npm、yarn、pnpm)运行的命令:"dev": "vite"——启动 Vite 开发服务器,用于本地开发,支持热更新。- 执行 npm run dev 命令后,npm 会查找本地 node_modules/.bin/vite 可执行文件,调用这个文件,启动开发服务器。
"build": "run-p type-check \"build-only {@}\" --"——先执行类型检查,再执行生产构建(使用npm-run-all2并行执行命令)。"preview": "vite preview"——在本地预览生产构建后的项目。"build-only": "vite build"——仅执行生产构建,不进行类型检查。"type-check": "vue-tsc --build"——使用vue-tsc对项目进行 TypeScript 类型检查。"format": "prettier --write src/"——使用 Prettier 格式化src目录下的代码。
dependencies是 生产依赖- 项目运行时必需的依赖:
"pinia": "^3.0.3":Vue 官方状态管理库,用于替代 Vuex,提供更简洁的状态管理方案。"vue": "^3.5.22":Vue 3 核心库,用于构建用户界面。"vue-router": "^4.6.3":Vue 3 官方路由库,用于实现单页应用的路由功能。
- 项目运行时必需的依赖:
devDependencies是开发依赖是项目开发和构建时需要的依赖,生产环境不需要:
"@tsconfig/node22": "^22.0.2"、"@types/node": "^22.18.11":Node.js 和 TypeScript 相关的类型定义。"@vitejs/plugin-vue": "^6.0.1":Vite 官方的 Vue 插件,用于支持 Vue 单文件组件(SFC)。"@vue/tsconfig": "^0.8.1":Vue 官方的 TypeScript 配置模板。"npm-run-all2": "^8.0.4":用于并行或串行执行多个 npm 脚本。"prettier": "3.6.2":代码格式化工具,保持代码风格统一。"typescript": "~5.9.0":TypeScript 语言,用于为 JavaScript 添加类型检查。"vite": "^7.1.11":现代化前端构建工具,提供极速开发体验。"vite-plugin-vue-devtools": "^8.0.3":增强 Vue Devtools 功能的 Vite 插件。"vue-tsc": "^3.1.1":Vue 官方的 TypeScript 类型检查工具,用于对 Vue 组件进行类型检查。
Vite 常用功能
使用插件
Vite 可以通过插件扩展功能,它基于 Rollup 的插件接口设计,大部分 Rollup 插件都可以直接在 Vite 中使用。
例如,在 Vue3 开发中,我们经常需要写
import { ref, computed } from 'vue',使用插件可以省去这些重复操作。
安装依赖
1 | npm install -D unplugin-auto-import unplugin-vue-components |
配置 vite.config.js
若要使用一个插件,不仅需要将它添加到项目的
devDependencies 中(也就是在 package.json
中导入),还需要在 vite.config.js 配置文件中的
plugins 数组中引入它。
1 | import { defineConfig } from 'vite' |
plugins
也可以接受包含多个插件作为单个元素的预设。这对于使用多个插件实现的复杂特性(如框架集成)很有用。该数组将在内部被扁平化。
查找插件
可以使用此 npm Vite 插件搜索链接 来找到一些遵循了 推荐约定 的 Vite 插件,或者通过 npm Rollup 插件搜索链接 获取 Rollup 插件。
调整插件顺序
为了与某些 Rollup
插件兼容,可能需要强制修改插件的执行顺序,或者只在构建时使用。这应该是
Vite 插件的实现细节。可以使用 enforce
修饰符来强制插件的位置:
pre:在 Vite 核心插件之前调用该插件- 默认:在 Vite 核心插件之后调用该插件
post:在 Vite 构建插件之后调用该插件
1 | // vite.config.js |
按需要应用
默认情况下插件在开发 (serve) 和生产 (build)
模式中都会调用。如果插件在服务或构建期间按需使用,请使用
apply 属性指明它们仅在 'build' 或
'serve' 模式时调用:
1 | // vite.config.js |
使用 import 语句
Vite 对各种文件类型的 import 提供了增强支持。
CSS / 预处理器 可以直接导入 .css、.scss、.less 文件。
1
2import './style.css'
import './theme.scss' // 需要安装 sass: npm install -D sassCSS Modules 以
.module.css结尾的文件会被自动处理为 CSS Modules,避免样式冲突。1
2import styles from './App.module.css'
// 使用: <div :class="styles.wrapper"></div>JSON 导入 可以直接导入 JSON 文件,并支持具名导入(Tree-shaking)。
1
2import data from './data.json'
import { field } from './data.json' // 只打包 field 字段Glob 导入 (批量导入)
这是Vite 特有功能 使用
import.meta.glob可以从文件系统一次性导入多个模块(常用于路由自动加载)。1
2
3
4
5
6
7// 1. 懒加载(默认)
const modules = import.meta.glob('./dir/*.js')
// 结果: { './dir/foo.js': () => import('./dir/foo.js'), ... }
// 2. 直接加载 (Eager)
const modulesEager = import.meta.glob('./dir/*.js', { eager: true })
// 结果: { './dir/foo.js': Module, ... }
使用环境变量
Vite 在 import.meta.env 对象上暴露环境变量。
这里有一些在所有情况下都可以使用的内建变量:
import.meta.env.MODE: {string} 应用运行的模式。import.meta.env.BASE_URL: {string} 部署应用时的基本 URL。他由base配置项决定。import.meta.env.PROD: {boolean} 应用是否运行在生产环境。import.meta.env.DEV: {boolean} 应用是否运行在开发环境 (永远与import.meta.env.PROD相反)。import.meta.env.SSR: {boolean} 应用是否运行在 server 上。
在生产环境中,这些环境变量会在构建时被静态替换,因此,在引用它们时请使用完全静态的字符串。
Vite 使用 dotenv 从你的 环境目录 中的下列文件加载额外的环境变量:
创建环境文件(在项目根目录下):
.env:所有环境通用.env.development:开发环境(npm run dev 时加载).env.production:生产环境(npm run build 时加载)
1
2
3
4.env # 所有情况下都会加载
.env.local # 所有情况下都会加载,但会被 git 忽略
.env.[mode] # 只在指定模式下加载
.env.[mode].local # 只在指定模式下加载,但会被 git 忽略- 一份用于指定模式的文件(例如
.env.production)会比通用形式的优先级更高(例如.env)。 - 另外,Vite 执行时已经存在的环境变量有最高的优先级,不会被
.env类文件覆盖。例如当运行VITE_SOME_KEY=123 vite build的时候。 .env类文件会在 Vite 启动一开始时被加载,而改动会在重启服务器后生效。
定义变量: 为了防止意外泄露隐私信息,只有以 VITE_ 开头的变量才会暴露给客户端代码。
1
2
3# .env.development
VITE_API_BASE_URL=http://localhost:3000
VITE_APP_TITLE=我的Vue应用(开发版)在代码中使用:
1
2
3console.log(import.meta.env.VITE_APP_TITLE)
console.log(import.meta.env.MODE) // 'development' 或 'production'
console.log(import.meta.env.PROD) // boolean,是否为生产环境
静态资源处理
vite引入静态资源文件
public 目录应位于你的项目根目录。该目录中的资源在开发时能直接通过 / 根路径访问到,并且打包时会被完整复制到目标目录的根目录下。
引入 public 中的资源永远应该使用根绝对路径 —— 举个例子,public/icon.png 应该在源码中被引用为 /icon.png。
public 中的资源在项目打包时不会被压缩转换、所以这个文件夹下不应该放项目依赖的js文件,通常,放一些网站icon、logo,网页背景图片。
public 目录可以通过 publicDir选项 来配置。
那么 vite 项目内可以直接引入各种静态资源文件。例如在根目录引入如下内容
1 | import imgUrl from "./testJs.jpg"; |
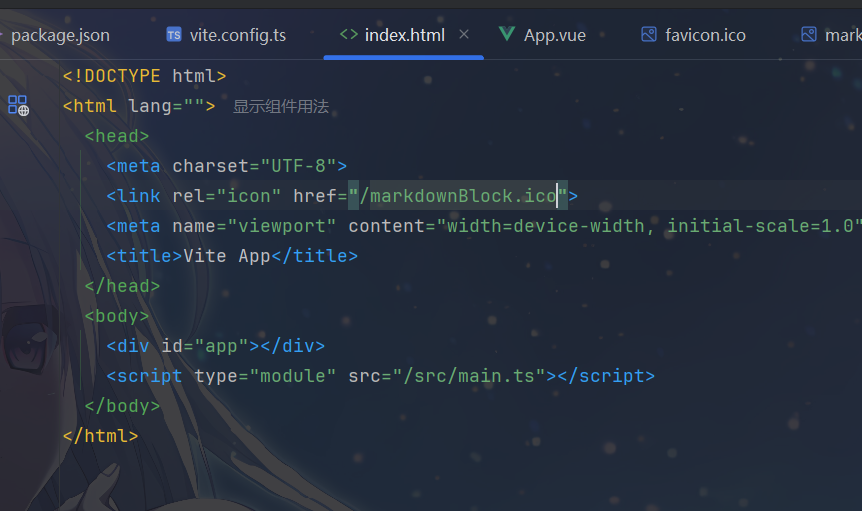
例如,我自己在 public 中新建一个ico,那么我该如何引入
因为放在 public 的文件会以站点根路径对外提供,直接用绝对路径引用即可,例如: /markdownBlock.ico

将资源引入为 URL
传统方式引入资源需要直接写路径,需要自己管理
1 | // 直接写路径,需要自己管理 |
- 开发环境和生产环境路径可能不一致
- 资源被打包后可能重命名(如
img.123abc.png),手动路径会失效
Vite 能将资源引入为 URL,服务时引入一个静态资源会返回解析后的公共路径:
1 | import imgUrl from './img.png' |
- Vite 会解析这个导入,返回该图片的最终访问路径
- 开发环境:返回类似
/src/img.png的路径 - 生产环境:返回类似
/assets/img.123abc.png的路径(带哈希值)
实际上,在你导入你的资源的时候,Vite 会 复制图片到输出目录,然后生成唯一的带哈希文件名,返回最终的 URL 路径,最后再将 URL 赋值给 img.src 属性
Vite 还支持特殊的查询参数和动态引入。
显式 URL 引入 (?url)
1 | import workletURL from './worklet.js?url' // 获取文件的 URL 路径,而不是内容 |
以字符串形式引入 (?raw) 常用于读取 SVG 内容或 Shader 代码
1 | import shaderString from './shader.glsl?raw' |
import.meta.env.BASE_URL ,拼接公共路径
1 | const fileUrl = import.meta.env.BASE_URL + 'markdownBlock.ico' |
为什么需要这样做
- 路径自动处理:无需关心资源在不同环境的实际路径
- 缓存优化:生产环境自动添加哈希后缀,实现长效缓存
- 构建优化:Vite 会自动处理资源,如图片压缩、Base64 内联等
- 类型安全:TypeScript 能正确识别资源导入
部署静态站点
当你运行 npm run build 时:
- Vite 会将代码打包到 dist 目录。
- 生成的 dist 目录是完全静态的,可以部署到 GitHub Pages、Vercel、Nginx 等。
- 本地预览:打包后,可以使用 npm run preview 在本地启动一个服务器预览打包后的效果(用于检查生产环境构建是否正常)。
你可以通过 --port 参数来配置服务的运行端口。
1 | { |
Vite 常用配置
在 vite.config.js 或 vite.config.ts 中,我们可以进行深度定制。
开发服务器配置 (server)
1
2
3
4
5
6
7
8
9
10
11
12
13
14export default defineConfig({
server: {
host: '0.0.0.0', // 允许局域网访问
port: 3000, // 指定端口
open: true, // 启动后自动打开浏览器
proxy: { // 配置跨域代理
'/api': {
target: 'http://jsonplaceholder.typicode.com',
changeOrigin: true,
rewrite: (path) => path.replace(/^\/api/, '')
}
}
}
})路径别名 (resolve.alias)
虽然模板默认配置了 @,但你可以添加更多。
1
2
3
4
5
6
7
8
9
10
11import { fileURLToPath, URL } from 'node:url'
export default defineConfig({
resolve: {
alias: {
'@': fileURLToPath(new URL('./src', import.meta.url)),
'comps': fileURLToPath(new URL('./src/components', import.meta.url)),
'utils': fileURLToPath(new URL('./src/utils', import.meta.url))
}
}
})构建选项 (build)
控制生产环境打包的行为。
1
2
3
4
5
6
7
8
9
10
11
12
13
14
15
16
17
18export default defineConfig({
build: {
outDir: 'dist', // 输出目录
assetsDir: 'assets', // 静态资源存放目录
sourcemap: false, // 是否生成 source map(生产环境建议关闭)
minify: 'esbuild', // 压缩混淆器,可选 'terser'(更慢但压缩率略高)
rollupOptions: {
output: {
// 分包策略:把 node_modules 中的代码单独打包
manualChunks(id) {
if (id.includes('node_modules')) {
return 'vendor';
}
}
}
}
}
})CSS 全局变量配置
如果使用 SCSS,不想在每个文件都 @import 变量文件,可以配置全局注入。
1
2
3
4
5
6
7
8
9
10export default defineConfig({
css: {
preprocessorOptions: {
scss: {
// 自动在每个 scss 文件头部引入 variables.scss
additionalData: `@import "@/assets/variables.scss";`
}
}
}
})构建分析工具配置
1
2
3
4
5
6
7
8
9
10
11
12
13
14
15
16
17
18
19
20
21
22
23
24
25
26
27import { defineConfig } from 'vite'
import { visualizer } from 'rollup-plugin-visualizer'
export default defineConfig({
plugins: [
// 构建分析插件
visualizer({
filename: 'dist/stats.html',
open: true,
gzipSize: true,
brotliSize: true,
template: 'treemap', // 可选: treemap, sunburst, network
sourcemap: true
})
],
build: {
rollupOptions: {
output: {
// 生成 manifest 文件
manifest: true,
// 生成 sourcemap 用于分析
sourcemap: true
}
}
}
})Terser 代码压缩配置
1
2
3
4
5
6
7
8
9
10
11
12
13
14
15
16
17
18
19
20
21
22
23
24
25
26
27
28
29
30
31
32
33
34
35
36
37
38
39
40
41
42
43
44
45
46
47
48
49
50
51
52
53
54
55
56
57
58
59
60
61
62
63
64
65
66
67
68
69
70
71
72
73
74export default defineConfig({
build: {
minify: 'terser',
terserOptions: {
compress: {
// 删除 console
drop_console: true,
// 删除 debugger
drop_debugger: true,
// 删除未使用的代码
dead_code: true,
// 优化条件表达式
conditionals: true,
// 优化布尔值
booleans: true,
// 优化循环
loops: true,
// 优化函数
functions: true,
// 优化变量
variables: true,
// 优化属性访问
properties: true,
// 优化字符串
strings: true,
// 优化数字
numbers: true,
// 优化正则表达式
regex: true,
// 优化数组
arrays: true,
// 优化对象
objects: true,
// 优化 try-catch
try_catch: true,
// 优化 switch
switch: true,
// 优化 if 语句
if_return: true,
// 优化序列
sequences: true,
// 优化表达式
evaluate: true,
// 优化 typeof
typeofs: true,
// 优化全局变量
global_defs: {
'@process.env.NODE_ENV': '"production"'
}
},
mangle: {
// 混淆变量名
toplevel: true,
// 混淆函数名
keep_fnames: false,
// 混淆类名
keep_classnames: false,
// 混淆属性名
properties: {
regex: /^_/
}
},
format: {
// 保留注释
comments: false,
// 美化输出
beautify: false,
// 压缩输出
ascii_only: true
}
}
}
})CSS压缩配置
1
2
3
4
5
6
7
8
9
10
11
12
13
14
15
16
17
18
19
20
21
22
23
24
25
26
27
28
29
30
31
32
33
34
35
36
37
38
39
40
41
42
43
44
45
46
47
48
49export default defineConfig({
build: {
cssCodeSplit: true,
cssMinify: 'esbuild',
rollupOptions: {
output: {
// CSS 文件命名
assetFileNames: (assetInfo) => {
if (assetInfo.name.endsWith('.css')) {
return 'css/[name]-[hash].css'
}
return 'assets/[name]-[hash].[ext]'
}
}
}
},
css: {
postcss: {
plugins: [
require('autoprefixer'),
require('cssnano')({
preset: ['default', {
discardComments: {
removeAll: true
},
normalizeWhitespace: true,
colormin: true,
minifyFontValues: true,
minifySelectors: true,
mergeLonghand: true,
mergeRules: true,
minifyGradients: true,
minifyParams: true,
minifyTimingFunctions: true,
normalizeUrl: true,
orderedValues: true,
reduceIdents: true,
reduceInitial: true,
reduceTransforms: true,
svgo: true,
uniqueSelectors: true
}]
})
]
}
}
})开发服务器优化配置
1
2
3
4
5
6
7
8
9
10
11
12
13
14
15
16
17
18
19
20
21
22
23
24
25
26
27
28
29
30
31
32
33
34
35
36export default defineConfig({
server: {
// 启用 HTTP/2
https: false,
// 预热文件
warmup: {
clientFiles: [
'./src/main.js',
'./src/App.vue',
'./src/components/**/*.vue'
]
},
// 文件系统缓存
fs: {
strict: false,
allow: ['..']
},
// 中间件配置
middlewareMode: false,
// 预转换
preTransformRequests: true
},
// 依赖预构建
optimizeDeps: {
// 预构建策略
esbuildOptions: {
target: 'es2020'
}
}
})缓存策略配置
1
2
3
4
5
6
7
8
9
10
11
12
13
14
15
16
17
18
19
20
21
22
23
24export default defineConfig({
build: {
rollupOptions: {
output: {
// 文件哈希
entryFileNames: 'js/[name]-[hash].js',
chunkFileNames: 'js/[name]-[hash].js',
assetFileNames: 'assets/[name]-[hash].[ext]',
// 生成 manifest
manifest: true
}
}
},
// 缓存配置
cacheDir: 'node_modules/.vite',
// 预构建缓存
optimizeDeps: {
force: false
}
})
社区模板
什么是 Vite 社区模板
Vite 社区模板是由官方或社区开发者预先配置好的项目骨架,针对不同的框架、库和开发需求提供开箱即用的项目结构。它们解决了从零开始配置项目的繁琐过程,让开发者可以直接专注于业务开发。
官方模板 vs 社区模板
官方模板(
@vitejs/create-app)1
2
3# 使用官方模板创建项目
npm create vite@latest my-project -- --template vue
npm create vite@latest my-project -- --template react-ts官方支持的模板包括:
- vanilla /vanilla-ts (原生 JavaScript/TypeScript)
- vue / vue-ts (Vue 3)
- react / react-ts (React)
- preact / preact-ts (Preact)
- lit / lit-ts (Lit)
- svelte / svelte-ts (Svelte)
社区模板
社区开发者基于官方模板扩展,提供更丰富的功能和集成:
1
2
3# 使用社区模板
npm create @github-user/my-template@latest
pnpm create vite-template-vue3
常用的社区模板类型
1.Vue 生态模板
- vite-vue3-template:集成 Vue Router、Pinia、Element Plus、UnoCSS
- vue3-admin-template:后台管理系统模板
- vitesse:轻量级 Vue 3 模板,集成 UnoCSS、VueUse 等
2. React 生态模板
- vite-react-template:集成 React Router、Redux Toolkit、Ant Design
- vite-ts-react:TypeScript + React + ESLint + Prettier
- react-admin-template:React 管理后台模板
3. 全栈模板
- vite-express-template:Vite + Express 全栈模板
- vite-nuxt-template:Vite + Nuxt 3 模板
- vite-next-template:Vite + Next.js 模板
使用社区模板的方法
方法 1:通过 npm create
1 | # 使用社区模板创建项目 |
方法 2:通过 degit
1 | # 安装 degit |
方法 3:直接使用 GitHub 模板
1 | # 使用 GitHub 仓库作为模板 |
除了官方的 npm create vue@latest,社区提供了很多集成度更高的模板(开箱即用):
- Vitesse (by Anthony Fu)
- 特点:基于文件的路由、自动导入、Markdown 支持、PWA、暗色模式。
- 适合:喜欢尝鲜、追求极致开发体验的高级开发者。
- Vue-Pure-Admin
- 特点:功能非常全面的后台管理系统模板,集成了 Tailwind CSS、Element Plus 等。
- 适合:企业级后台管理项目。
- Soybean Admin
- 特点:清新优雅的后台管理模板,代码规范,TypeScript 支持度高。